

Howdy, Stranger!
It looks like you're new here. If you want to get involved, click one of these buttons!
Categories
- 241.3K All Categories
- 22 >> Start Here <<
- 12 New Members
- 8 FAQs
- 86.5K Gear
- 39.5K Guitar
- 3.4K Acoustics
- 1.3K Bass
- 14.6K Amps
- 17.2K FX
- 265 Digital & Modelling
- 765 Other Instruments
- 8.2K Making & Modding
- 419 Gear Reviews
- 107 Guitar Reviews
- 73 Amp Reviews
- 118 FX Reviews
- 87 Other Reviews
- 748 Made in the UK
- 972 Theory
- 1.8K Technique
- 2.1K Live
- 3.2K Studio & Recording
- 2.1K Making Music
- 218 Events
- 15 Guitar Show 2018
- 829 Plug My Stuff
- 105K Classifieds
- 41K Guitars £
- 2.8K Acoustics £
- 138 LH Guitars £
- 894 Basses £
- 10.5K Parts £
- 18.3K Amps £
- 34K FX £
- 2.8K Studio & Rec £
- 6.1K Misc £
- 465 Personnel
- 54.6K Chat
- 36.5K Off Topic
- 1.1K Tributes
- 6.6K Music
In this Discussion
Become a Subscriber!
Subscribe to our Patreon, and get image uploads with no ads on the site!
Sporkbasster 1
 Sporky
Frets: 28123
Sporky
Frets: 28123
Kludged from the other build threads... bit of a painful journey in places!
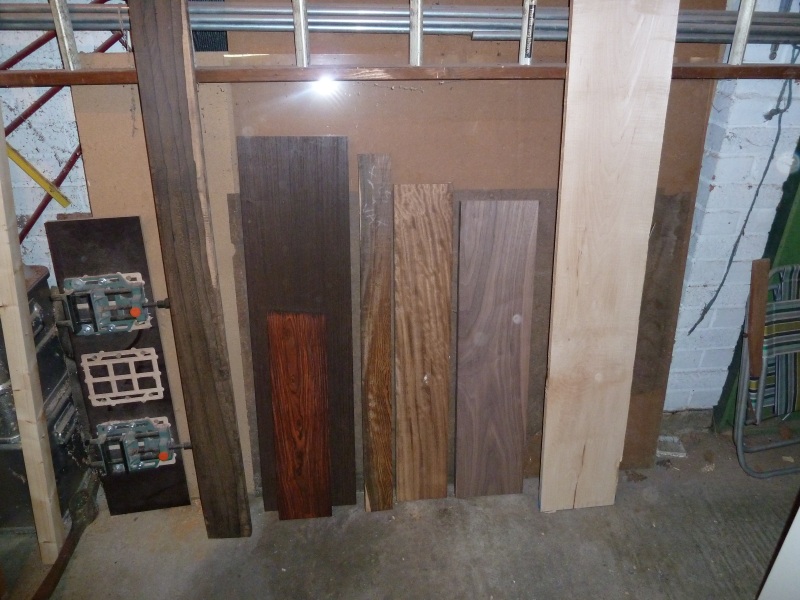
Timber! I started by picking three bits out of this. Some iroko, some wenge and some maple.
Then I applied this to the bits of wood:
Then I applied this to the wenge:
Then I applied this to all the bits:
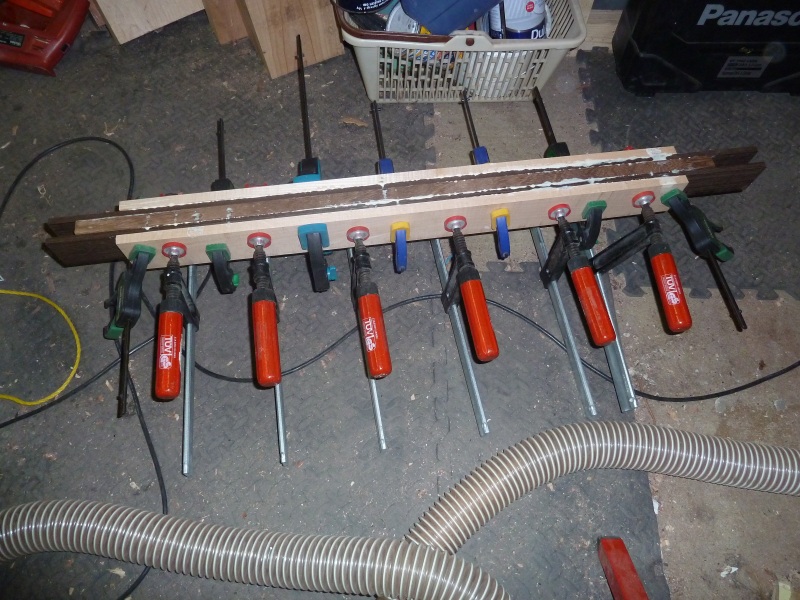
Then I glued the bits together and clamped them up like this:
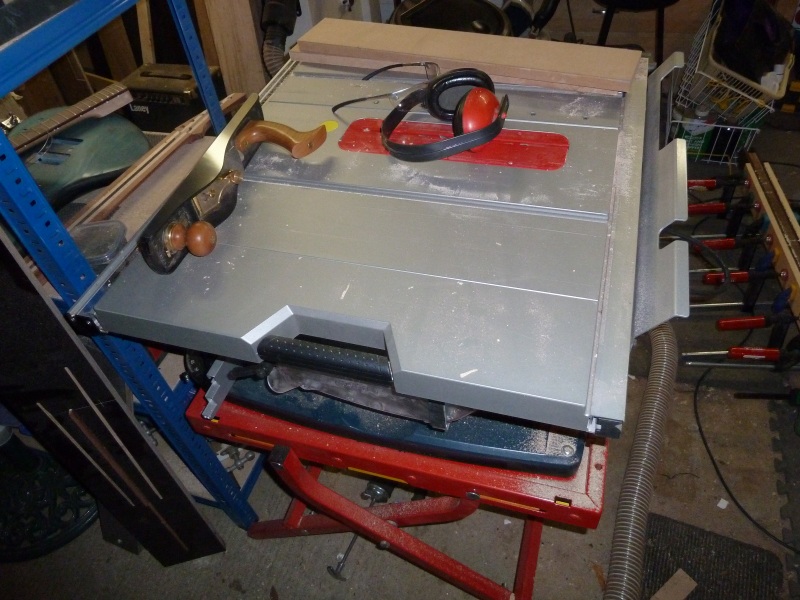
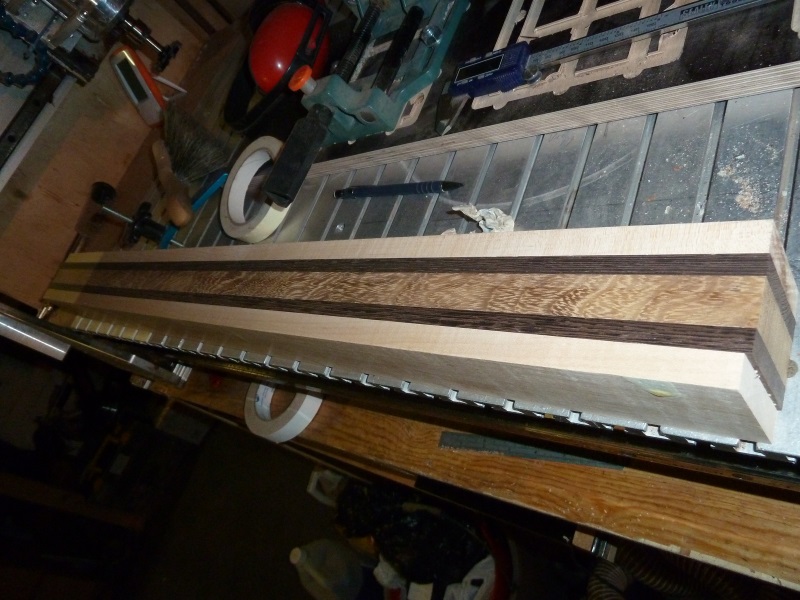
The next day I unclamped, trimmed using the tablesaw and then planed top and bottom on the CNC machine (just in manual mode):
Timber! I started by picking three bits out of this. Some iroko, some wenge and some maple.
Then I applied this to the bits of wood:
Then I applied this to the wenge:
Then I applied this to all the bits:
Then I glued the bits together and clamped them up like this:
The next day I unclamped, trimmed using the tablesaw and then planed top and bottom on the CNC machine (just in manual mode):
"[Sporky] brings a certain vibe and dignity to the forum."
0 LOL 0
LOL 0 Wow! 0
 Wisdom
LOL 0 Wow! 0 Wisdom Base theme by DesignModo & ported to Powered by Vanilla by Chris Ireland, modified by the "theFB" team.
Comments
Today was a bit varied. First job was to cut the headstock angle onto the neck blank:
Next I made up a wedge to support the headstock when I'm machining the back of the neck later. First rough cut some 12mm ply:
That gets machined by the CNC router and comes out like this (after trimming the web and a touch of sanding):
I used that and another four bits of ply to make a stack:
And here you can see that it'll nestle nicely under the headstock later on:
Next job is to cut some blanks for pickup covers from the same bit of wenge that supplied the neck stripes:
They'll get machined later in the week - just working out a strategy to hold them in place while they're cut.
Finally I got started on the body - this is the stuff it'll be made from. Worm infested maple - the bugs carry a fungus which causes the funky stains.
And a closeup - there's some nice flame to this:
That lump is only about 130mm wide so I cut it into three bits on the tablesaw:
I missed a couple of photos here - basically the middle bit gets planed both sides, cut to square and replaned. The two outer bits only get planed one side each. The strips between are some ebony fretboards I got cheap - too thin to use for fretboards though so now they're accent lines. Note that this is the back of the body - the fancy stuff is on the other side. I'll unclamp and clean up tomorrow.
First I machined the recesses in the pickup covers and made up a plug that'll hold them securely to the CNC machine while I cut the outsides. The plug needs recutting as I forgot to allow any clearance - about a quarter of a millimeter should be enough, and that's a pretty quick job for tomorrow. Then I can get the rest of the covers done.
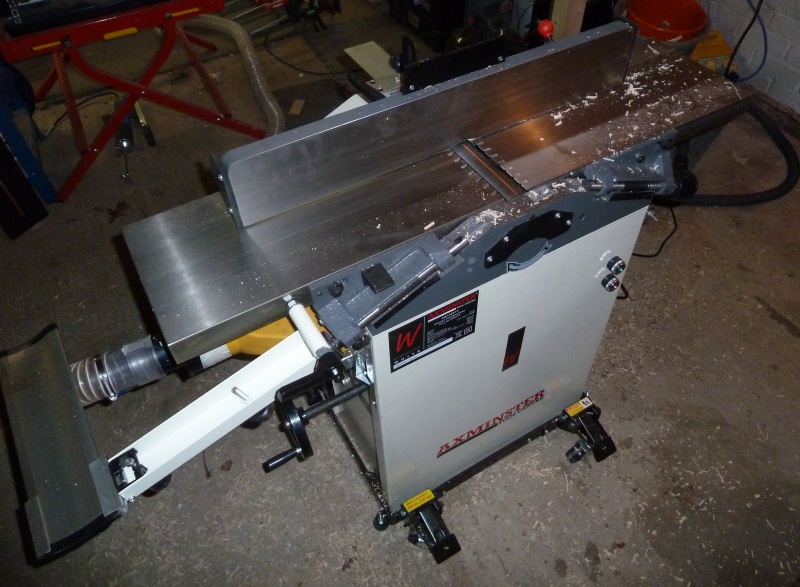
Next I planed the body flat - back first, then the top (shown below) - there's some really nice flame there now that I've taken about 1.5mm off the top. I am quite happy with this. It's not as orange as it appears here so a light transparent finish should look really tasty.
Next - machining the top (fretboard side) of the neck. I'd already cut the headstock angle so not that much left to do. First job is getting the neck secured to the CNC table and correctly aligned to the X-axis. I marked out the nut line on all four sides (or, rather, the headstock break line) and centreline points on each end and on the headstock break line. Then doublesided tape goes on the "bottom" of the blank, which is supported on two very thin offcuts so that it doesn't stick down. I roughly positioned it, then put two clamps against the far side of the blank but not screwed down too tightly - they'll move if nudged. That means I can fine tune the position; once it's right I put two more clamps on the near side and pulled out the offcuts. The neck then drops onto the table in perfect alignment. Ta da!
With that done I can use the spotting laser to zero the machine against the centre of the headstock break line:
And then I can machine the truss rod slot, in three passes, followed by an access cut (this'll need some fettling later):
Then a 1" ball end cutter machines the headstock angle precisely - at this point I discovered that I'd not been careful enough rough-cutting the headstock angle so moved the headstock break line back 2.5mm so that the cutter took about 0.7mm more off the face of the headstock, leaving it nice and smooth. I made a pencil note against the break line so I don't forget later...
Finally the neck gets two alignment holes for the fretboard - these will take 3mm steel pins.
First I've drilled the mounting holes and a recess for the cap head screws that'll hold them down (got them the wrong way around on the first one but carried on as a test):
Then a round-nose bit to do the contour over the cover:
Next the outer perimeter is cut:
And this is how they look coming off the CNC machine.
Tidy up a bit on the bandsaw:
Then a quick test that the pickups will fit into the cavity:
And finally trim the remaining web on the router table:
As you'll see this didn't go too well - the wenge is very fragile along the sides, and the router bit managed to take a big chunk of the side off. I might change to some Delrin instead for the next attempt. Doh etc.
Started on Friday with the neck. First job is to rough cut the blank so that there's less machining to do - this is carefully marked out and then fairly carefully cut on the bandsaw. Nicely the offcut is just big enough for a PRS scale fender-style neck:
The blank goes onto an alignment jig on the CNC machine - there's a 1/4" fillet running along the x-axis of the machine:
And then I used the laser to set the X (along the neck) and Y zero points:
The Y "zero" is done with an offset point that's 50mm from the centreline:
Machining time. First everything is roughed with a 1/2" cutter:
Then a 1/2" ball smooths it all out:
Next the outline is cut on the bandsaw so that there's less material for the final pass to remove:
The idea is that then the 1/2" cutter then cuts an accurate outline. In practice it instead tears the maple off the side of the neck, right along the glue line:
This is somewhat distressing. In places the glue has held and it's the wenge that's come apart but it looks like there was too big a shear force. It's also clear that I should have planned the thicknesses of the sections better so that the final cut was only in one piece and didn't traverse a join at all. Bah humbug etc. The neck is now in four pieces in the firewood bin! Well, and a few pieces in my arm. Turns out a two horsepower router can throw sharp bits of wood quite hard.
Ah well. On to the body - luckily this goes far better. The blank is aligned with the centreline on the CNC bed. First the rear is machined (partly because any mistakes here are easier to hide later!) - 1/4" cutter first:
Next a 1/2" flat end cutter:
Then a 1/2" ball (this was terrifying - far too deep a cut for some reason but nothing actually went wrong) and then a 3/16" bit to cut the neck bolt relief holes:
Next the blank gets flipped and the front is cut with a 1/4":
Then the 1/2" flat:
Then the 1/2" flat does two passes of the perimeter:
Next I rough cut the outline on the bandsaw, again to reduce stress on the cutter. Note that the positioning lugs are next to the rear cutouts so I've used a metric crapload of double-sided tape to make sure nothing moves once they're cut free.
And this is the result. I'll tidy up with a drum sander and various planes, scrapers and so on.
Just had time to try a couple of stains on the offcuts - I favour the teal:
Next assemble the bits and bobs needed:
And zero the CNC machine:
Three channels with a 1/4" inch bit get cut; one for the truss rod, two for the carbon fibre reinforcement. I had to deepen these slightly, which I did with a 6mm chisel, held pretty much vertically and used like a scraper.
Then my lovely new 8mm ball-end cutter does the truss rod relief at the headstock, and you can just see the 3mm hole that'll take the steel fretboard alignment pin:
And finally the headstock is surfaced with a 1/2" ball (needs sharpening or replacing with a solid carbide one - the latter might be the better option - for now I gave it a quick sharpen).
The neck gets flipped over and re-zeroed, then the rear of the headstock is done - a teeny 2.3mm bit cuts the tuner alignment holes and then cuts through the rear of the tuner holes - note the very slight alignment error, it's about 0.15mm which I fixed after doing these - not a problem here at all and a good way to verify the alignment.
Then the 1/2" ball does about 40 minutes of work on the back of the neck, getting it very close to the final shape. I leave a teeny bit for hand sanding as the ball doesn't leave things totally smooth and it's nice to be able to tweak the shape a little.
Then I do one pass with the 1/2" downcut:
Bandsaw to the middle of that channel (or a bit further in) to reduce stress on the bit as it does the final cutout:
And ta-da! Fits very snugly into the body (as it darned well should). This is not going to be neck-heavy! There's about 0.75mm left not cut out from the neck profile; that'll get done when the fretboard is attached.
While the 1/2" ball was doing its work I smoothed out the elbow, belly and thigh carves on the body:
And did some more test stains - these are the teal, blue and black sanded back and restained with the teal. The more I look at these the more tempted I am to just finish the body in clear - they all seem to take away from how striking the wood is.
On the downside I exploded another bit of maple - pretty sure this was down to poor planning on my part in terms of the order of cuts. I've worked out a new strategy for attempt #4, where I'll cut the truss rod and CF slots first, then the outline of the neck, then the rear and do the headstock carve last so that the entire neck is supported for as long as possible. Also I'll make up a new neck machining jig that'll give a more positive reference for the machine - should have done that ages ago.
Bit of a hairy moment when I was doing up he last clamp on the neck and spotted the truss rod I'd forgotten to put in - luckily the glue hadn't quite taken and I managed to prise it all apart in time.
And the body, now rounded over - again still plenty of sanding to do:
And the neck fitted to the body:
It's very snug indeed - I am most happy with this.
All was going well - I'd done a nice job on the fretboard inlays and some tests for side dots (they'll be a 4.8mm white ring, with a 3.18mm silver ringinside that and a 2.4mm black dot in the middle), but when I came to lay out the side dots I realised I'd put the 12th fret inlay at... the 13th fret.
I'd decided not to worry (it's for me, not for sale) but then managed to knock the entire thing off the bench - on hitting the floor the fretboard split away from the neck. Managed to save the truss rod but the CF was glued in pretty snugly.
Ho hum. A few weeks off, I think!
Unclamped it this afternoon, all looks fine. I should have wiped off more of the glue that seeped out but not worth worrying about - it's too tight in the neck pocket at the mo so a bit of scrapering and sanding won't hurt things.
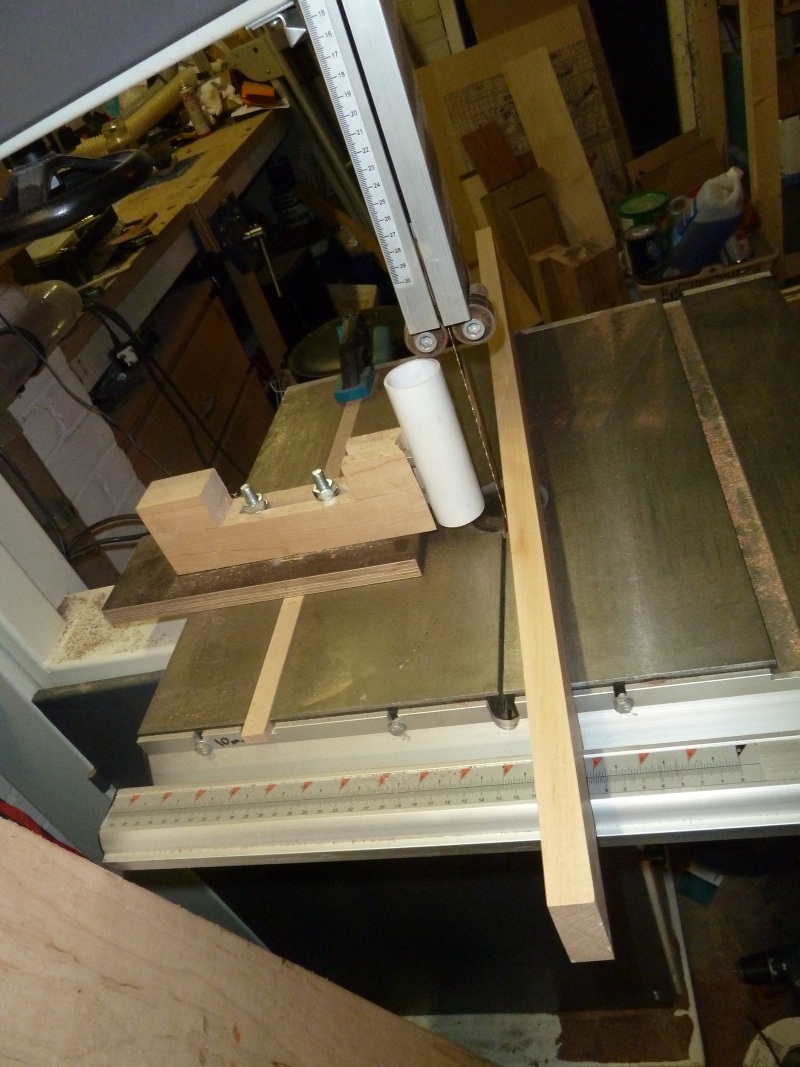
First job for today was to machine the holes for the side dots - these are 4.85mm diameter holes, done in the vice jig so that the side of the neck is level:
Then each hole gets a bit of 4.8mm plastic tube, cut with a Japanese style flush-saw:
Then I used a pipe cutter to cut a little bit of aluminium tube to fit inside the plastic tube:
Then the ali tube gets some black plastic dot inside it, and the combination is drenched in thin cyanoacrylate.
Sanded them flush and did the face inlays - the pockets are cut by the CNC machine, the pearl by hand:
I was very pleased that the twelfth fret inlays were actually at the twelfth fret this time! Next job will be to finish the carve on the back of the neck, then I can get fretting. I need to make a 500mm sanding beam as well - that's about an hour's machining though so can wait for another day.
I also did a fair bit more sanding on the body and got the neck profile completed and the back of the neck sanded to 800 grit. Not that much left to do now.
I should have taken pictures of the sanding beam - it's worked really well. Just a bit of Iroko from the timber place's scrap bin, CNC'd to the right radius, then I stuck on some neoprene and the self-adhesive sandpaper I use goes straight on. I am most pleased with that.
Anyways, this is the current state of the neck:
And I managed to make two matching pickup covers - these are gelstained maple:
I had another look at the neck and it's not really that bad - I've done better but as this is just for me it'll do. I can always have a go at refretting later. Part of the problem, I think, was that I used too wide a fret file so it flattened them down too much - got a set of the Hosco ones now so I can use the right tool for the job.
And the finish is, I think, done enough. You can still feel the grain a little in places but the finish is pretty hard and should be enough to protect it. I may have another go at the pickup covers as I think they could better match the rest of the instrument in terms of colours, but they're not awful. I might just do some in maple but dyed ebony-black.
You're great you are ! (but you already know this
Feedback
I'm actually making this primarily to play Rocksmith with!
The 5-er isn't going to be a bass - it's an extended range instrument. Pedantic, I know, but it basically covers the same range as a 7er guitar but with just 5 strings tuned in 5ths. It's an idea that intrigued me when I first heard it. A bit like with the pedals, I can't see much point in making stuff that other people are making just as well or better already - more interesting to do something a bit different.
As a slightly odd but clearly quite loving mother once said in my earshot (on a pirate mini-golf course) "it's all about having fun and improving".
I think one of the techs has done some enhancement - 31 are real.