

Howdy, Stranger!
It looks like you're new here. If you want to get involved, click one of these buttons!
Categories
- 241.3K All Categories
- 22 >> Start Here <<
- 12 New Members
- 8 FAQs
- 86.6K Gear
- 39.5K Guitar
- 3.4K Acoustics
- 1.3K Bass
- 14.6K Amps
- 17.2K FX
- 266 Digital & Modelling
- 765 Other Instruments
- 8.3K Making & Modding
- 420 Gear Reviews
- 107 Guitar Reviews
- 73 Amp Reviews
- 118 FX Reviews
- 87 Other Reviews
- 748 Made in the UK
- 972 Theory
- 1.8K Technique
- 2.1K Live
- 3.2K Studio & Recording
- 2.1K Making Music
- 218 Events
- 15 Guitar Show 2018
- 829 Plug My Stuff
- 105K Classifieds
- 41K Guitars £
- 2.8K Acoustics £
- 138 LH Guitars £
- 895 Basses £
- 10.5K Parts £
- 18.3K Amps £
- 34K FX £
- 2.8K Studio & Rec £
- 6.1K Misc £
- 465 Personnel
- 54.7K Chat
- 36.5K Off Topic
- 1.1K Tributes
- 6.6K Music
In this Discussion
Become a Subscriber!
Subscribe to our Patreon, and get image uploads with no ads on the site!
My first pedal build
 freakboy1610
Frets: 1209
freakboy1610
Frets: 1209
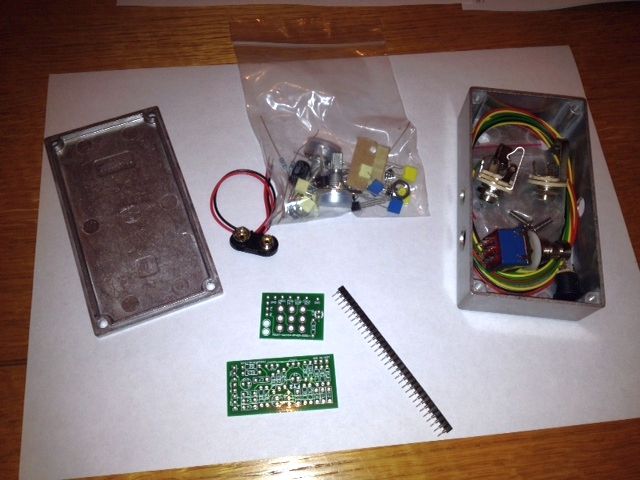
I recently finished making a Shin-Ei Companion Fuzz FY2 kit from Pedalparts and, whilst the thread is hardly original, I was keen to share it with you. Thanks to the demands of the wife and kids it took me nearly three months to complete when I could grab the odd spare hour here and there. It started out like this and I have to admit that I had the bits spread out on the table several times before I finally got started.
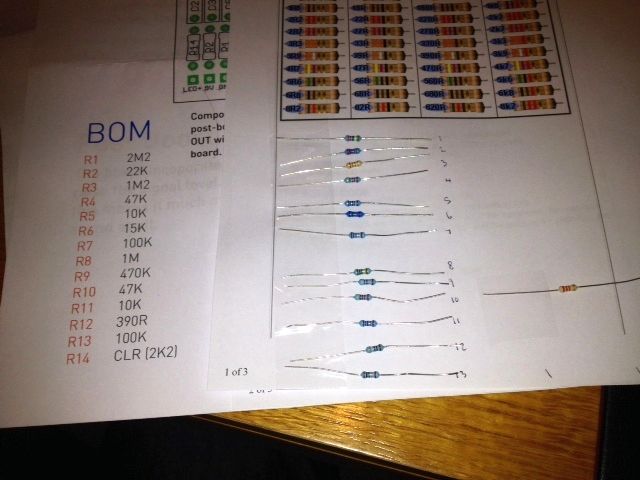
Once I persuaded myself to take the plunge I suddenly realised that the resistors weren't labelled resulting in me spending several hours on the internet finding out how to identify them. It's actually harder than it sounds figuring out the colour codes. Is that brown or gold? Which way round is it? Having got my components in order I decided to make sure by buying a cheap multimeter on Ebay.
Soldering was hit and miss at first. I had some practice a while ago but I was a bit nervous and heavy handed to start with. Cheap solder (also from Ebay) kept going blobby when my iron was hot. Later on I got some 0.7mm Stannol multicore 60/40 22swg which was much better.
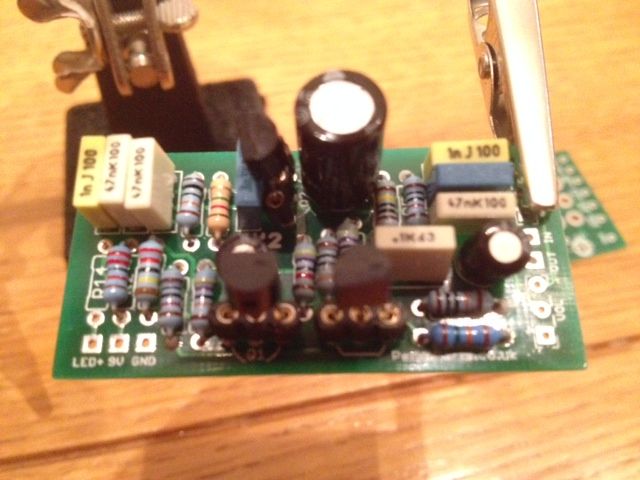
Having populated my PCB I set about putting all of the bits into the box. Some of the components were a little tall and I found that the only way this was going to fit was face down on top of the pots (ultimately face up I guess).
I found the offboard wiring the most nerve-racking and needed much advice and support via text from @handsomerik. He also kindly provided me with the sockets for the transistors which probably saved them from being fried during the soldering process. I had some heat shrink tubing to cover the wiring on the pots but forgot to do the first leg on both!
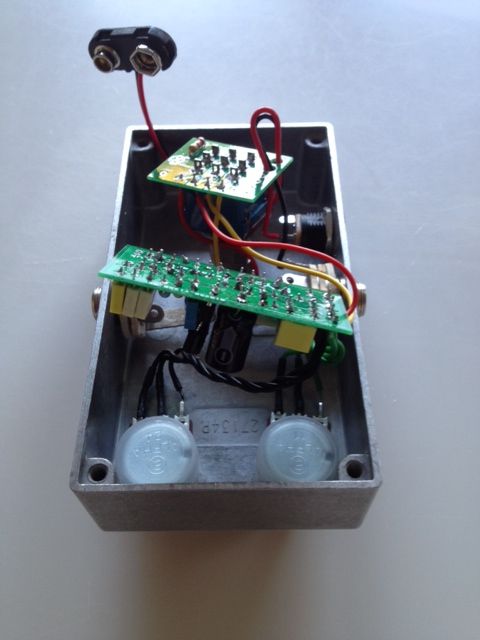
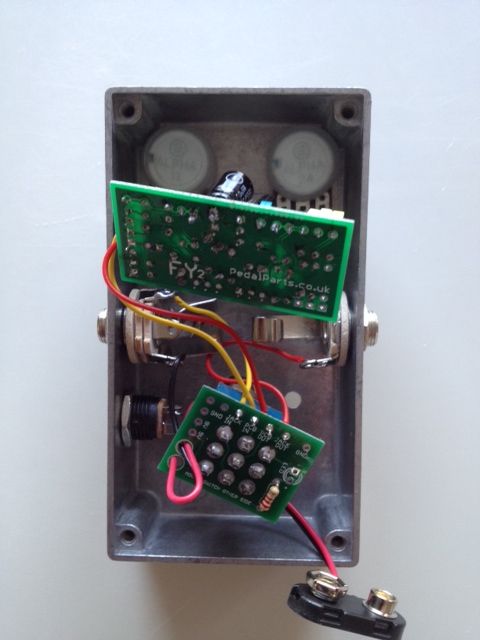
I got one of Poodles mini PCBs for the switch and this was really helpful as switch wiring looks really fiddly and I've discovered during the course of this build that I probably need reading glasses. The joys of middle age! Anyway, wiring complete, I gently eased it all into the box but try as I might I couldn't make it look tidy in there. I had needed some slack on the switch as this had the LED soldered to it and went in last.

Grabbed a 9v battery from my tuner, shoved in a lead and to my surprise the LED came on! Ran upstairs and grabbed my THR10 and the J Mascis Jazz and holy crap it works!!!
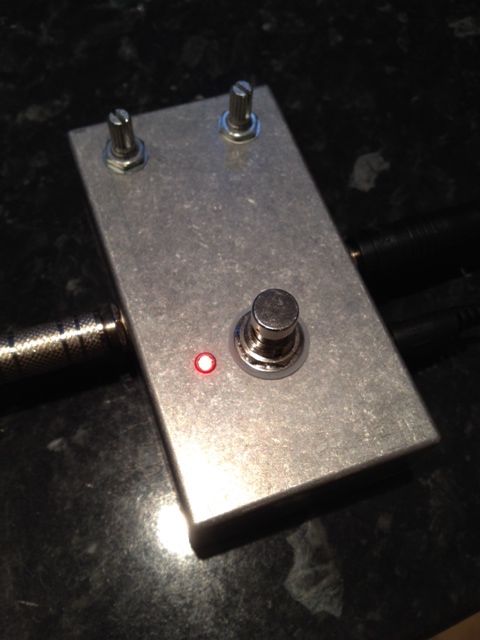
At this point I was so pleased/relieved that I hardly noticed that I hadn't decorated the box. Should have done this before putting the guts in but I really wasn't expecting it to work. I had a few attempts at the artwork which ended up in the bin but eventually found a great font on the internet which I really liked and went with that.
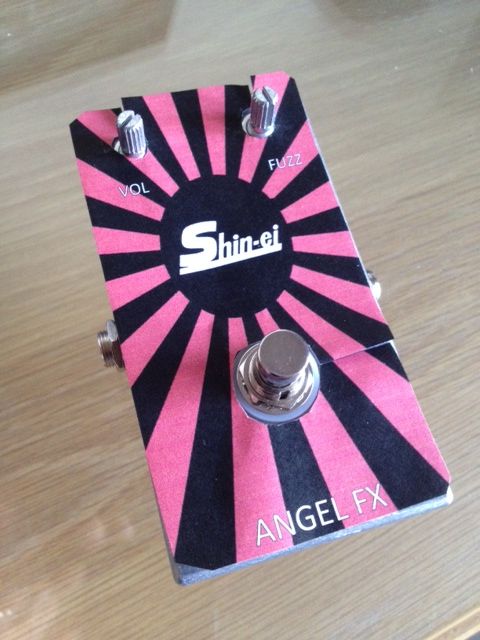
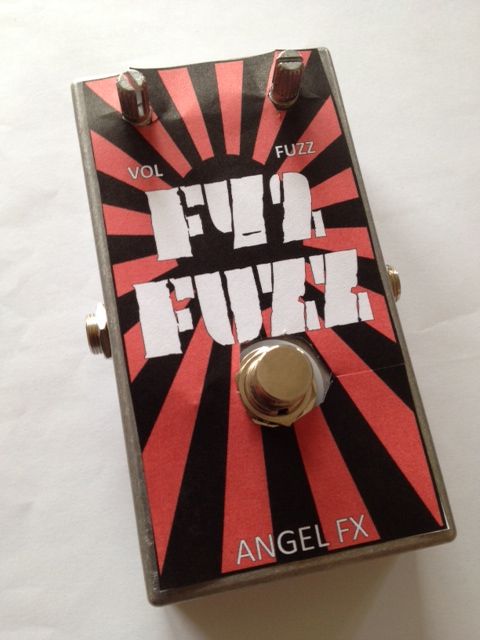
Printed onto clear adhesive paper and carefully applied to the box (having even more carefully removed the guts which were now permanently attached to the box by the power supply which had the nut on the inside of the pedal). I then had to put the guts into a sandwich bag whilst I gave the box 3 coats of lacquer. Not sure if that's enough but it was getting dark and cold in the garage! And here it is!
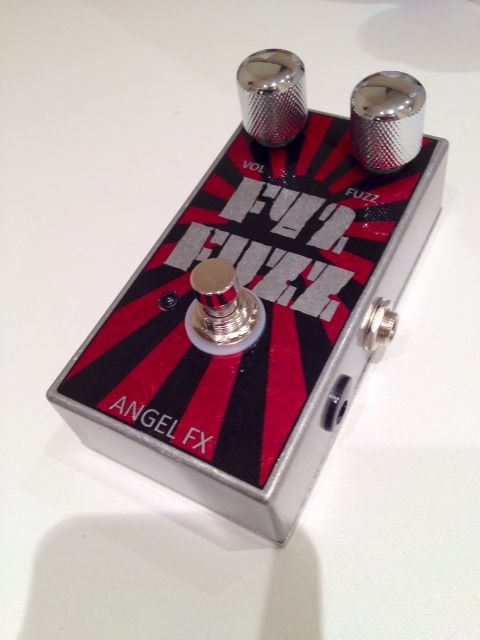
I had some old telecaster style knobs tucked away. No position indicators but it's not the sort of pedal that requires subtle adjustment. It sounds just awesome. Full on Mary Chain style nasty fuzz.
 LOL 0
LOL 0 Wow! 0
 Wisdom
 Base theme by DesignModo & ported to Powered by Vanilla by Chris Ireland, modified by the "theFB" team.
Comments
https://www.thefretboard.co.uk/discussion/57776/handsomerik/p1