

Howdy, Stranger!
It looks like you're new here. If you want to get involved, click one of these buttons!
Categories
- 242.3K All Categories
- 22 >> Start Here <<
- 12 New Members
- 8 FAQs
- 86.9K Gear
- 39.6K Guitar
- 3.4K Acoustics
- 1.3K Bass
- 14.7K Amps
- 17.3K FX
- 277 Digital & Modelling
- 766 Other Instruments
- 8.3K Making & Modding
- 422 Gear Reviews
- 107 Guitar Reviews
- 73 Amp Reviews
- 119 FX Reviews
- 87 Other Reviews
- 750 Made in the UK
- 975 Theory
- 1.9K Technique
- 2.1K Live
- 3.2K Studio & Recording
- 2.1K Making Music
- 220 Events
- 15 Guitar Show 2018
- 834 Plug My Stuff
- 105.5K Classifieds
- 41.2K Guitars £
- 2.8K Acoustics £
- 140 LH Guitars £
- 903 Basses £
- 10.6K Parts £
- 18.4K Amps £
- 34.2K FX £
- 2.8K Studio & Rec £
- 6.1K Misc £
- 465 Personnel
- 54.9K Chat
- 36.6K Off Topic
- 1.1K Tributes
- 6.6K Music
In this Discussion
Become a Subscriber!
Subscribe to our Patreon, and get image uploads with no ads on the site!
My new(ish) workshop
 Sporky
Frets: 28674
Sporky
Frets: 28674
I bought a house in May of 2019, and moved into it in January of 2021 - in between, apart from some minor gutting, demolishing, and rebuilding of the house, I ask the builders nicely to make me a new workshop. They were very happy to oblige in exchange for an excruciating amount of money, which I hid in the house budget. Here's how it happened - bear in mind there are gaps as much of it was during lockdown when I couldn't visit. The new house is built on (and slightly in) a rather steep hill, so the garden is on two levels, and the entrance to the garden is on another level.
My last house had a lovely garden room style workshop; the only real disadvantage of it was the low ceiling so as not to need PP, so the new one was just a teeny bit longer and wider, but quite a chunk taller. I also wanted even better sound and heat insulation, so we set the size at 7.3m x 4.3m internally as that nestled neatly between the RPAs of some TPO'd trees.
First the rickety old sheds were cleared, and a hole dug for the foundations. I'm not sure how they got a mini digger up the steps, and I'm not minded to ask.

Concrete slab went down, pumped via some very long pipes from the mixer at the front of the house (I'd guess it's 45-50m away). I missed that bit entirely, so next the walls went up. At this stage it looked chuffing enormous - this was, I think, my first visit to site after work had started.


Then the walls went higher and roof timbers went on.


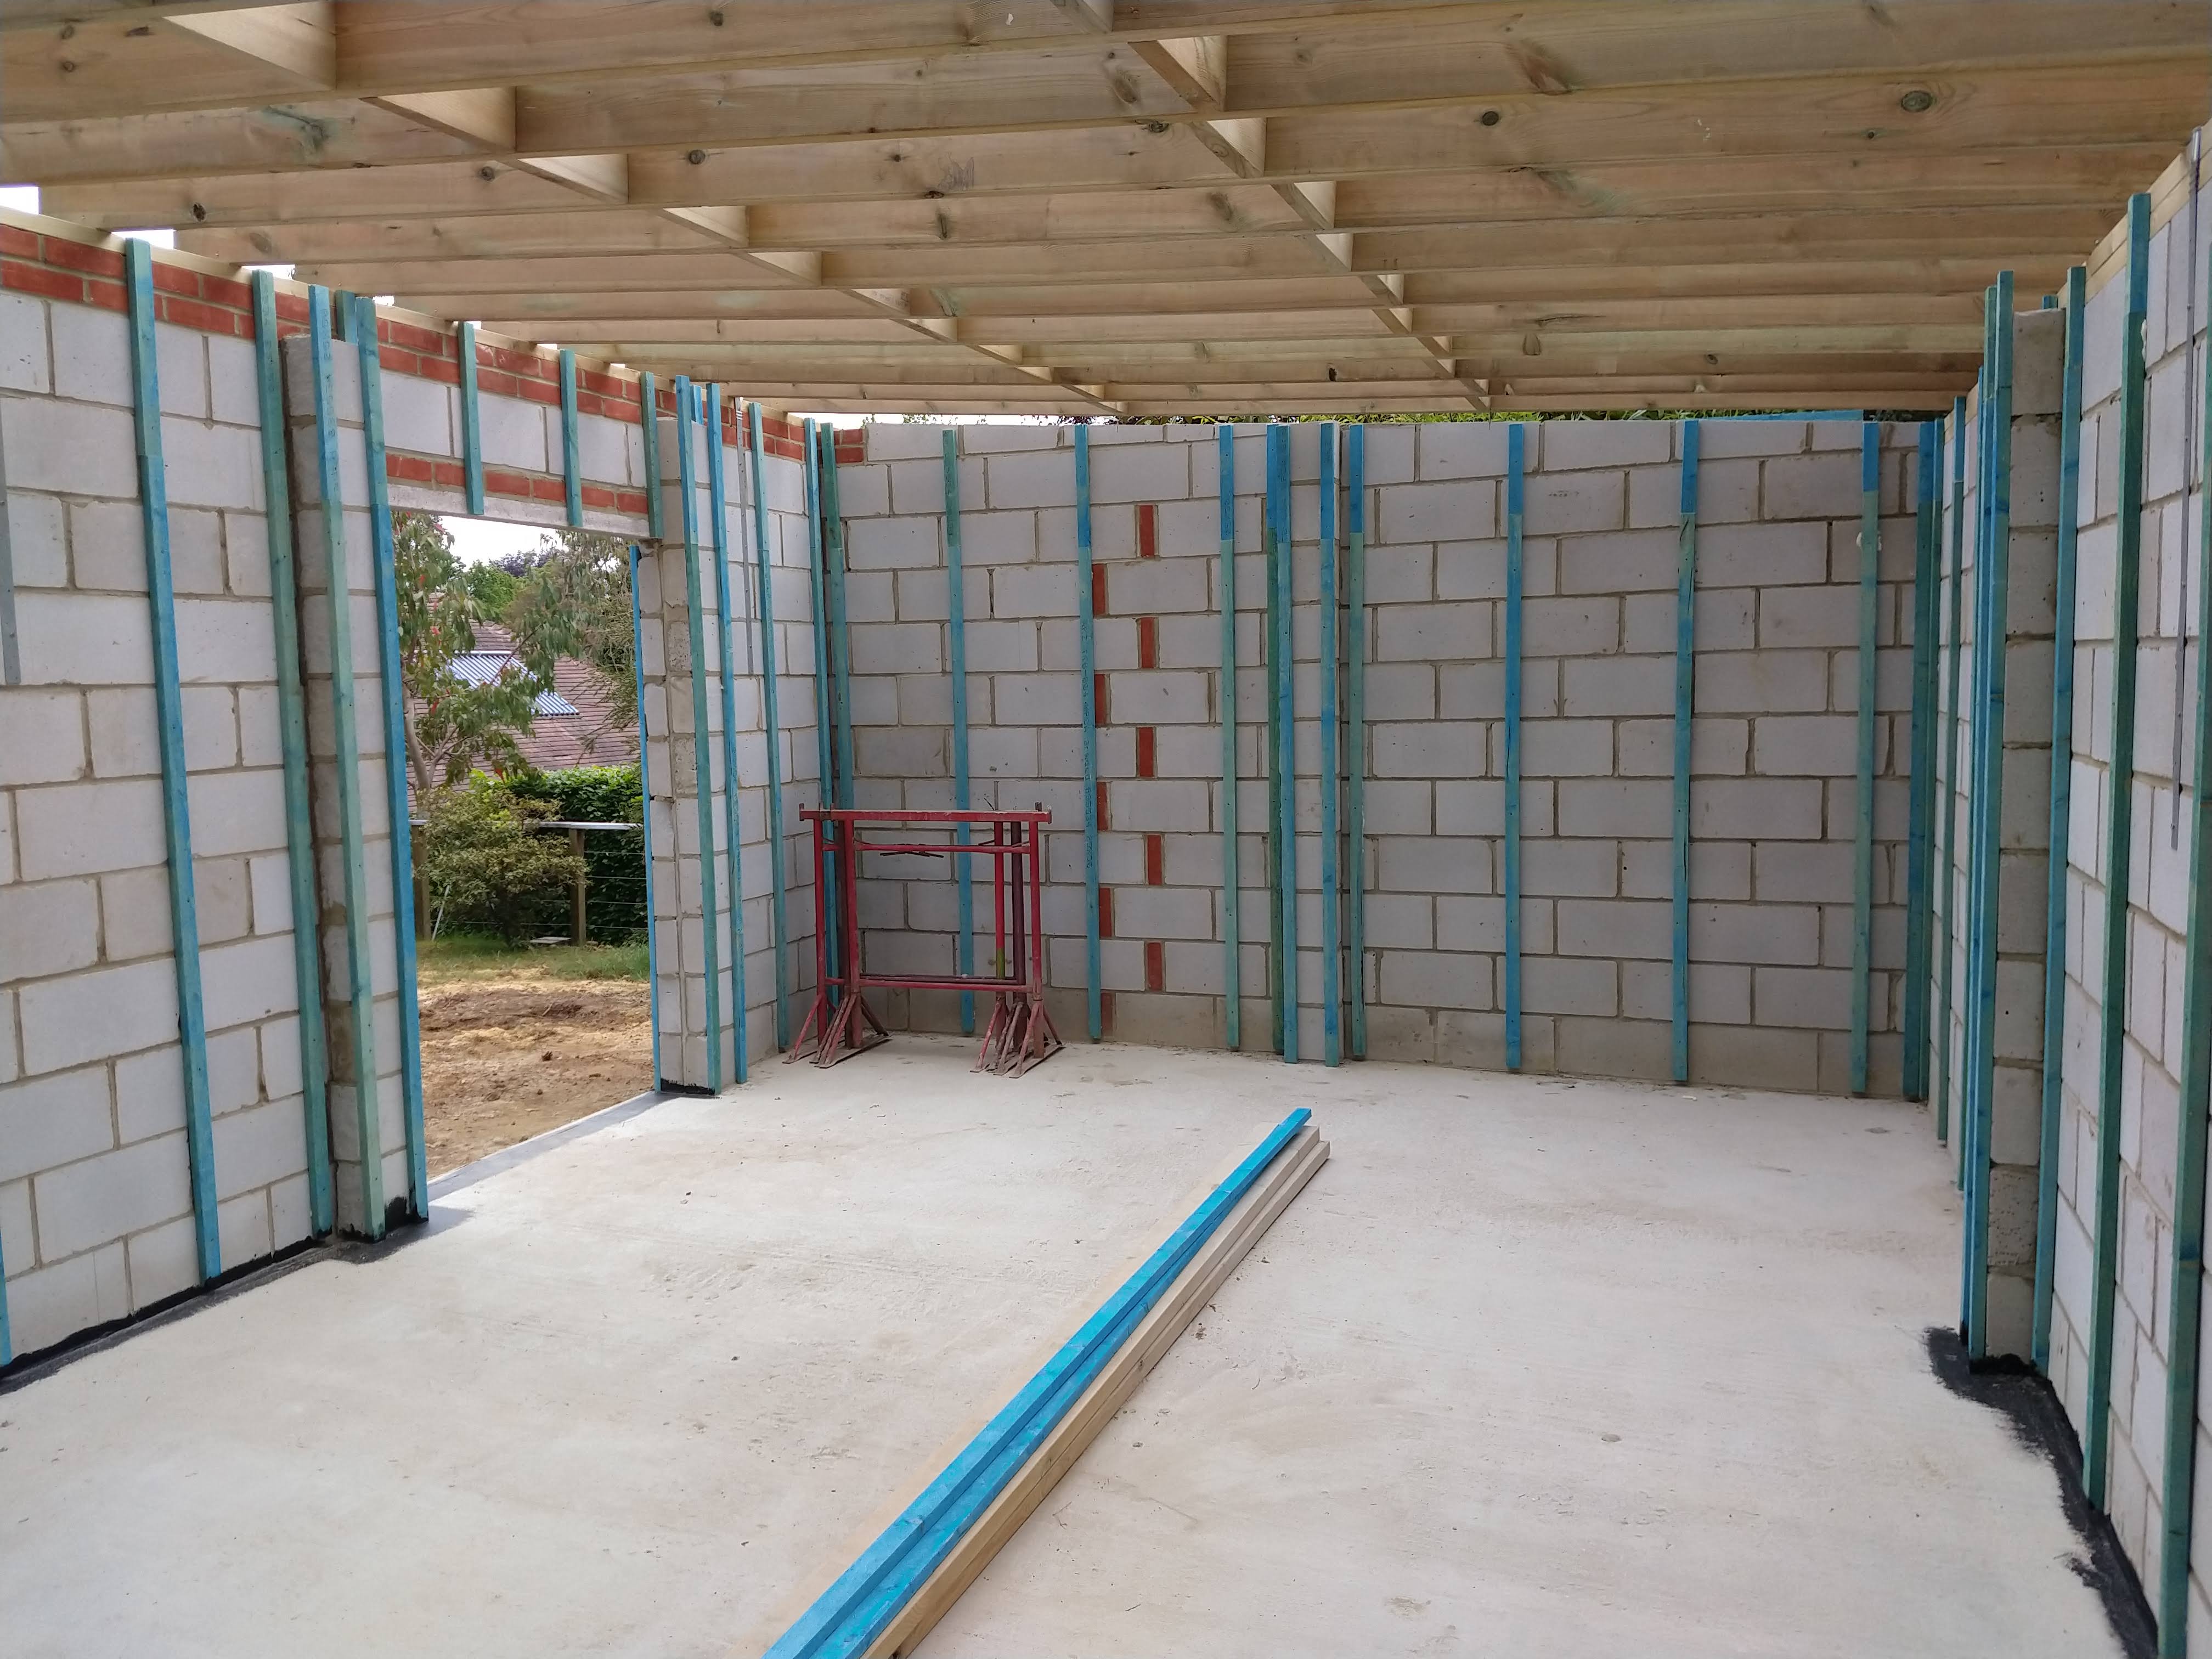


My last house had a lovely garden room style workshop; the only real disadvantage of it was the low ceiling so as not to need PP, so the new one was just a teeny bit longer and wider, but quite a chunk taller. I also wanted even better sound and heat insulation, so we set the size at 7.3m x 4.3m internally as that nestled neatly between the RPAs of some TPO'd trees.
First the rickety old sheds were cleared, and a hole dug for the foundations. I'm not sure how they got a mini digger up the steps, and I'm not minded to ask.
Concrete slab went down, pumped via some very long pipes from the mixer at the front of the house (I'd guess it's 45-50m away). I missed that bit entirely, so next the walls went up. At this stage it looked chuffing enormous - this was, I think, my first visit to site after work had started.
Then the walls went higher and roof timbers went on.
"[Sporky] brings a certain vibe and dignity to the forum."
0 LOL 2
LOL 2 Wow! 0
 Wisdom
LOL 2 Wow! 0 Wisdom Base theme by DesignModo & ported to Powered by Vanilla by Chris Ireland, modified by the "theFB" team.
Comments
Next visit the electrics were in, and they'd put up my air cleaner, which was nice. I celebrated by starting the dust extraction ducting. I did that bit myself. I actually rather enjoy the ducting installation; it's a nice combination of planning ahead and then botching it finished. For the previous workshop I even did sums to get the sizes right, but as this one is barely larger and almost exactly the same layout I didn't do sums. I did have to recut pretty much every piece though - just an extra 30cm each way messes up everything.
Next time I got to site the builders had rather kindly fitted all the flooring tiles for me - these are Plasfloor. I finished the ducting. I hope you all like pictures of ducting in various states of installation; there will be more in the next post. I'd brought a few assemblies over from the last workshop but had to rebuild most because of the higher ceiling.
Some of you may spot
Some of you may spot a schoolboy error in this picture. More on that later (about a year later).
Actually, that's it until the day all the machines arrived. I didn't take any photos of that because it was quite a long hard day - three flights of steps to get up to the workshop - and the machine movers didn't seem to be enjoying it much. They cheered up a lot when the scaffolders helped. One of the latter pretty much carried the bandsaw up the steps on his own, which was rather impressive.
Anyways, it's a lovely space. Roof is that black membrane stuff. It stays delightfully cool all through summer, and in winter a little oil-filled radiator keeps it entirely usable. Very good sound insulation too - even with the dust extractor and CNC machine running, from outside it's barely audible. So overall I know paying someone to build it was cheating, but I still think it was a darned good idea. Comments and questions welcome.
[edit] Forgot to mention - part of the planning application/approval (we had a brilliant and very helpful planning officer) was that it should look "in keeping with the area, and of a domestic appearance". This was solved by wood cladding the whole thing. You might have guessed that was coming on account of the bits of blue timber stuck on the outside walls. This is the finished article:
The 45
The 45 on the door is a joke about the rear neighbours, who complained to planning, building control, environmental health, the architect, trading standards, and the police that we were building a second house in the garden. They are now "known to the police", so that didn't work out how they expected.
Storage for fasteners and DIY stuff:
Main bench:
Timber storage and clamps:
The lathe (the big green machinist lamps were meant to go into my office, but I bought the wrong size and couldn't walk under them so they ended up here):
Mitre saw with stupid (but brilliant) dust hood:
Sharpening station (this cabinet has a lot of the lathe bits in it too):
The big CNC machine, here cutting ventilation holes into a door for the media cabinet in the living room:
The little CNC machine - haven't used this in a while, it just does PCBs and only works with my Windows 2000 PC...
A drill. Actually a really nice one because that knob on the left hand side of the top bit changes the speed - no switching belts between pulleys.
Little Bosch tablesaw - I had a big Electra Bekum panel saw for years and made almost nothing with it - this one is a lot more convenient and accurate.
Bandsaw - this was the first bit of wood working machinery I ever bought.
Incra router table. The positioner (the big gold bit) is really clever, but the base is awful. All solved now but painful to get to a working state.
And a more general view - here I've solved the mistake with the ducting I mentioned earlier - the extractor now has a full-sized 200mm main duct instead of the silly little 150mm one it came with - this has made a huge difference to how well it all works.
I should probably make something!
Some questions:
Are you aware that your bush appears to be looking at you?
Can we see more of the dog? I've missed the dog!
I am well aware of the bush; I am the one who made the giant googly-eyes and attached them to it.
Yes. Is there a specific dog thread, or does one make one's own?
Lovely workshop.
Supportact said: [my style is] probably more an accumulation of limitations and bad habits than a 'style'.
Bloody cool.
Over the weekend I added some ceiling-hung power and put in rigid ducting to the mitre saw hood, which has made quite a difference.
Next weekend I will do some more work on Lady BMcH's loom bench - I've already planed and thicknessed a load of ash. I'm planning my first mortice & tenon joints...
It has that harsh hewn look that I really like.
https://soundcertified.com/speaker-ohms-calculator/
https://soundcertified.com/speaker-ohms-calculator/