

Howdy, Stranger!
It looks like you're new here. If you want to get involved, click one of these buttons!
Categories
- 248.1K All Categories
- 22 >> Start Here <<
- 12 New Members
- 8 FAQs
- 88.9K Gear
- 40.4K Guitar
- 3.5K Acoustics
- 1.3K Bass
- 15.1K Amps
- 17.6K FX
- 359 Digital & Modelling
- 785 Other Instruments
- 8.5K Making & Modding
- 431 Gear Reviews
- 108 Guitar Reviews
- 74 Amp Reviews
- 119 FX Reviews
- 89 Other Reviews
- 756 Made in the UK
- 988 Theory
- 1.9K Technique
- 2.2K Live
- 3.2K Studio & Recording
- 2.2K Making Music
- 232 Events
- 15 Guitar Show 2018
- 867 Plug My Stuff
- 108.2K Classifieds
- 42.3K Guitars £
- 2.9K Acoustics £
- 146 LH Guitars £
- 925 Basses £
- 11K Parts £
- 18.8K Amps £
- 35K FX £
- 2.9K Studio & Rec £
- 6.3K Misc £
- 472 Personnel
- 56.2K Chat
- 37.5K Off Topic
- 1.2K Tributes
- 6.8K Music
In this Discussion
Become a Subscriber!
Subscribe to our Patreon, and get image uploads with no ads on the site!
My Harley Benton 335 conversion to 12-string
 JohnS37
Frets: 358
JohnS37
Frets: 358
I have ordered the parts and uploaded some images to a hosting site, so I don't have any excuse not to share this rather un-ambitious modding job with you. I have a lot of experience of DIY stuff in general, and the adjective I would apply to most of my work is 'sloppy', but, hey, at least I'll give it a go.
OK, so this is the unsuspecting 335-alike, the donor vehicle.

Most of the conversion work will be in the headstock area, so this is what I'm starting with

I worked out that there was a good chance of fitting all the extra tuners onto the existing headstock, without enlarging it, if I re-positioned the 'main string' tuners, and I worked it all out in Photoshop. The secondary tuners are banjo-style planetary tuners, like this:

and from the back:

The tuners I Photoshopped in are Firebird-style ones, but they proved to be pretty costly, so I have ordered banjo ones from China. These should actually be smaller, so I'm keeping my fingers crossed.
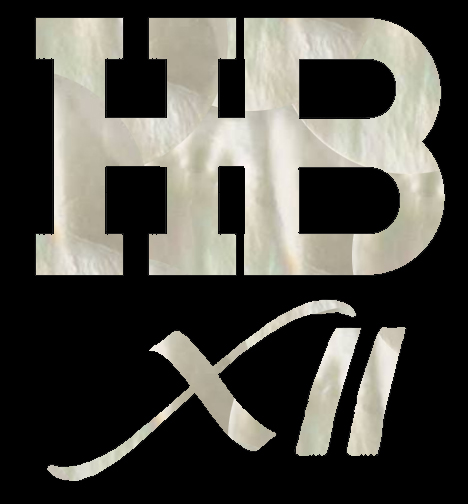
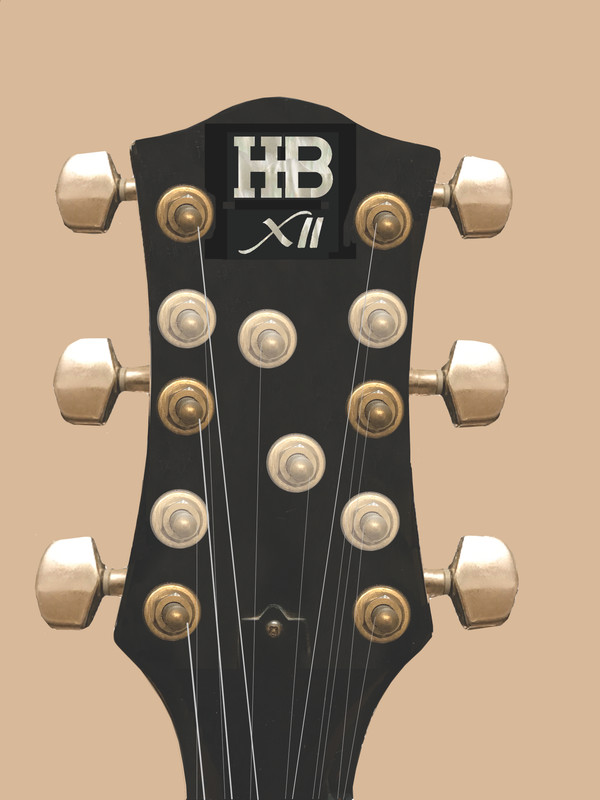
While I'm waiting I have been thinking about the final finish of the front of the headstock, and I will probably veneer over all the new drilling work. It will need a new logo, and I really don't like the existing Harley Benton logostyle, which is in the dreaded Brush Script, so I designed my own in MOP, (owing something to the Bugatti logo . . )

If I can manage all that intricate marquetry it should look something like this:
and this:
So, that's the story so far. If and when my bits turn up I'll post some more.
Please feel free to comment, tell me how it won't work etc. I haven't done anything irreversible yet!
OK, so this is the unsuspecting 335-alike, the donor vehicle.
Most of the conversion work will be in the headstock area, so this is what I'm starting with
I worked out that there was a good chance of fitting all the extra tuners onto the existing headstock, without enlarging it, if I re-positioned the 'main string' tuners, and I worked it all out in Photoshop. The secondary tuners are banjo-style planetary tuners, like this:
and from the back:
The tuners I Photoshopped in are Firebird-style ones, but they proved to be pretty costly, so I have ordered banjo ones from China. These should actually be smaller, so I'm keeping my fingers crossed.
While I'm waiting I have been thinking about the final finish of the front of the headstock, and I will probably veneer over all the new drilling work. It will need a new logo, and I really don't like the existing Harley Benton logostyle, which is in the dreaded Brush Script, so I designed my own in MOP, (owing something to the Bugatti logo . . )
If I can manage all that intricate marquetry it should look something like this:
and this:
So, that's the story so far. If and when my bits turn up I'll post some more.
Please feel free to comment, tell me how it won't work etc. I haven't done anything irreversible yet!
0 LOL 1
LOL 1 Wow! 0
 Wisdom
LOL 1 Wow! 0 Wisdom Base theme by DesignModo & ported to Powered by Vanilla by Chris Ireland, modified by the "theFB" team.
Comments
Instagram
"Take these three items, some WD-40, a vise grip, and a roll of duct tape. Any man worth his salt can fix almost any problem with this stuff alone." - Walt Kowalski
"Only two things are infinite - the universe, and human stupidity. And I'm not sure about the universe." - Albert Einstein
Scale length was unusually short of course, and it was a pig to play, but hey, sometimes it's the journey rather than the destination, Y/N?
Around the first lockdown I decided it wasn't getting used much so I sold it, totally honestly with many caveats, on the bay. And here we are, again.
Although you seem to have refined his methods quite nicely
Did it intonate correctly? It doesn't look like it would in the pic, but it could be an optical illusion.
"Take these three items, some WD-40, a vise grip, and a roll of duct tape. Any man worth his salt can fix almost any problem with this stuff alone." - Walt Kowalski
"Only two things are infinite - the universe, and human stupidity. And I'm not sure about the universe." - Albert Einstein
I think the most expensive part of this, er, ‘guitar’ was the set of strings.
(The keen of eye amongst you may have noticed how the bottom string curves in below the nut - just one of the easy-playing fringe benefits of my design, dontcha know?)
At the nut they look like those rubber strings you get on ukelele basses
"Take these three items, some WD-40, a vise grip, and a roll of duct tape. Any man worth his salt can fix almost any problem with this stuff alone." - Walt Kowalski
"Only two things are infinite - the universe, and human stupidity. And I'm not sure about the universe." - Albert Einstein
He is the Keyser Soze of guitar.
Just conventional Ernie Ball strings, but yes, I do remember those old Ashborys. They played surprisingly well, nearly bought one once, from Johnny Roadhouse on Oxford Road in Manchester, back in the day.
I had forgotten about him. I had better watch Usual Suspects again some night!
Next I stripped the strings off, removed the tuners, and looked at my photoshop version of the converted headstock, to see if any of the holes were in the right place to be kept. Turned out that four of them were almost perfactly placed, so only needed to plug two of them.
I prepared some short pieces of ramin dowel to plug the middle two holes and glued them in - they were a tight interference fit after paring down the oversize dowel.
During the drying period I marked up the positions of the new holes.
When the glue had had a few hours to go off I started drilling the new holes -
headstock now looks like a piece of Swiss cheese!
Next jobs are to remove the old nut and make a zero-fret and slotted 'nut' to replace the old nut. I have decided to go the zero fret route as I feel I can make it more accurately than a traditional nut-only job.
And this is where I need your help - looking at the guitar from the front, upright, do I put the main strings to the left and the secondaries to the right, or vice versa?
I know that some Rics have the mains on the right and the secondaries on the left, but most traditional acoustics have the main strings on the left and the secondaries on the right.
What do you think? Pros and cons?
"Take these three items, some WD-40, a vise grip, and a roll of duct tape. Any man worth his salt can fix almost any problem with this stuff alone." - Walt Kowalski
"Only two things are infinite - the universe, and human stupidity. And I'm not sure about the universe." - Albert Einstein
I can’t get any further now without deciding that, as I need to groove the bridge saddles and cut the nut thingy that will go behind my zero fret. I’ll go conventional.
Incidentally, I decided to make the zero fret out of a piece of mild steel, since I don’t have any fret wire, and in any case it needs to sit in the slot that originally held the old nut.
I have cut and polished it, and I’ll put the pics up when I have chosen the material for the spacer.
It's a photoshopped image of a piece of Zebrano, bookmatched in p'shop, laser printed on plain A4 and spray-mounted onto a piece of cereal box. Saves a whole lot of faffing to do the logo, and should look okay from a distance . . ?!
That's the 'zero fret' sitting there too.
In the photo I have cut a few slots, and the bottom D particularly looks wrong in the photo, but is actually OK in the flesh, don't know why.